Sprinter Van Cargo Space Optimization: Ultimate & Powerful
Maximize your Sprinter van’s cargo space with smart organization and storage solutions. This guide offers powerful, beginner-friendly strategies for efficient customization, ensuring every inch serves your needs, from professional tools to adventure gear.
The Mercedes-Benz Sprinter van is a marvel of utility, offering a vast canvas for customization. Yet, unlocking its full potential often hinges on effectively managing its generous cargo space. For many, a packed Sprinter can feel like a puzzle, with essential items lost in the shuffle or taking up valuable room. This can be frustrating, whether you’re a contractor needing quick access to tools, a camper van enthusiast craving organized living, or a business owner optimizing delivery routes. Fear not, for with a few strategic approaches, you can transform your Sprinter’s interior into a model of efficiency and power. We’ll walk you through simple, effective methods to optimize every cubic foot. Get ready to make your Sprinter work smarter for you.
Frequently Asked Questions About Sprinter Van Cargo Space Optimization
What is the most efficient way to organize a Sprinter van?
The most efficient way depends on your needs, but generally involves a layered approach. Start with a system that secures bulky items, then add shelving and drawers for smaller goods. Vertical space is key – think wall-mounted systems. Finally, ensure easy access to frequently used items. Labels are your best friend!
How can I maximize vertical space in my Sprinter van?
Utilize wall-mounted shelving units, overhead cabinets, and rack systems. Consider modular options that can be reconfigured as your needs change. For taller items, vertical dividers or specialized racks can prevent them from shifting.
What are the best materials for DIY Sprinter van shelving?
Common and effective materials for DIY shelving include plywood (1/2-inch or 3/4-inch birch or poplar are popular choices for their strength and weight), aluminum extrusion (like extrusions from 80/20 Inc. for lightweight, modular builds), and sometimes even sturdy plastic organizers or composite boards. Always prioritize strength, durability, and appropriate weight for your intended load.
How do I secure items in my Sprinter van cargo area?
Use a combination of E-track or L-track systems with straps and tie-down rings, D-rings bolted directly to the van’s frame, cargo nets, and secure shelving with lips or doors. For bulkier items, consider custom-built cradles or mounts.
Can I add more storage without permanent modifications?
Yes! Many removable solutions exist. Think freestanding shelving units designed to fit, cargo nets that attach to existing tie-down points, stackable bins, and magnetic tool holders. You can also use the van’s existing tie-down points with adjustable cargo bars to create temporary partitions.
What’s the difference between 144-inch and 170-inch Sprinter wheelbase for cargo?
The wheelbase significantly impacts cargo volume. A 170-inch wheelbase (or 170-inch extended) offers considerably more usable space for storage, living quarters, or larger equipment compared to the shorter 144-inch wheelbase. The internal cargo length and height are the key differentiators.
How do professional outfitters optimize Sprinter van cargo space?
Professionals often use CAD (Computer-Aided Design) to plan layouts precisely. They favor lightweight, durable materials and modular systems that can be easily customized. They also invest in high-quality hardware and professional installation for maximum safety and longevity, often integrating power and lighting into their storage solutions.
Understanding Your Sprinter’s Sacred Space
The Mercedes-Benz Sprinter is renowned for its cavernous interior, a blank slate waiting to be tailored to your specific needs. Whether it’s the compact 144-inch wheelbase or the sprawling 170-inch, each model offers a significant volume of potential storage. Before we dive into optimization, it’s crucial to understand the basic dimensions and features of your particular Sprinter. Knowing the usable length, width, and height, as well as the location of factory tie-down points, is the first step towards a truly powerful organization system.
Key Dimensions and Layout Considerations
Sprinter vans come in various configurations, primarily distinguished by their wheelbase and roof height. These choices directly influence your cargo capacity and how you can best utilize the space. Understanding these differences is fundamental to effective planning.
Wheelbase Options:
- 144-inch Wheelbase: This is the most maneuverable Sprinter, great for urban environments or when space is less of a primary concern. It still offers a substantial cargo area, but demands more efficient planning for fewer compromises.
- 170-inch Wheelbase: Offering a significant increase in cargo length, this option is ideal for those who need more room for equipment, living space, or extensive trade needs.
- 170-inch Extended Wheelbase: The longest option, providing maximum cargo volume for the most demanding applications.
Roof Height Options:
- Standard Roof: The base offering, suitable for most general cargo and fitting into standard garages.
- High Roof: This adds considerable vertical space, allowing many individuals to stand upright inside. It’s a game-changer for camper van conversions and mobile workshops, vastly improving usability and optimization potential.
Common Layout Challenges:
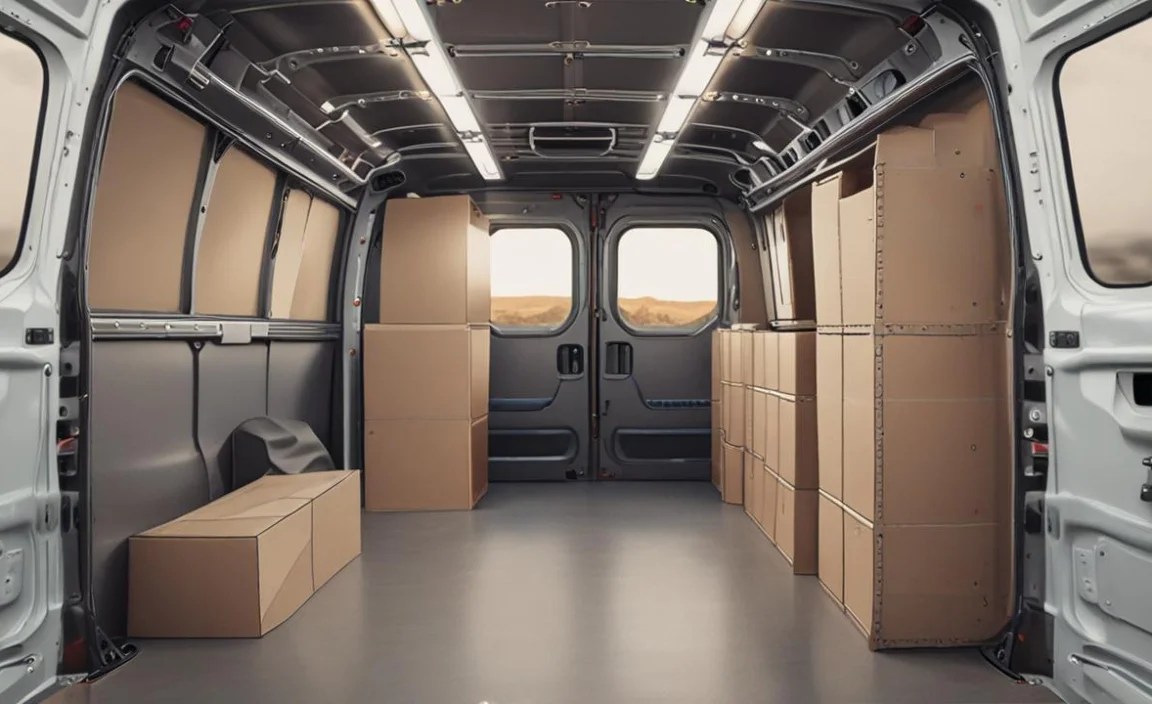
- The “Clutter Creep”: Over time, items tend to accumulate and can quickly turn an organized space into a chaotic one.
- Inefficient Vertical Use: Relying only on the floor space leaves a vast amount of cubic footage unused.
- Accessibility Issues: Items needed most are often buried under less critical gear, wasting time and effort.
- Item Shifting: Loose items can move around during transit, potentially causing damage to themselves, the van, or its passengers.
Planning Your Optimization Strategy

A successful Sprinter cargo space optimization begins not with tools, but with a pen and paper (or a digital equivalent). Define your primary use case for the van. Are you a tradesperson, a delivery driver, a weekend adventurer, a full-time van-lifer, or a combination of these?
Define Your Mission:
- Tradesperson: Focus on secure, easily accessible tool storage, material transport, and perhaps a mobile workbench.
- Delivery/Logistics: Prioritize speed of loading/unloading, compartmentalization for different packages, and weight distribution for fuel efficiency.
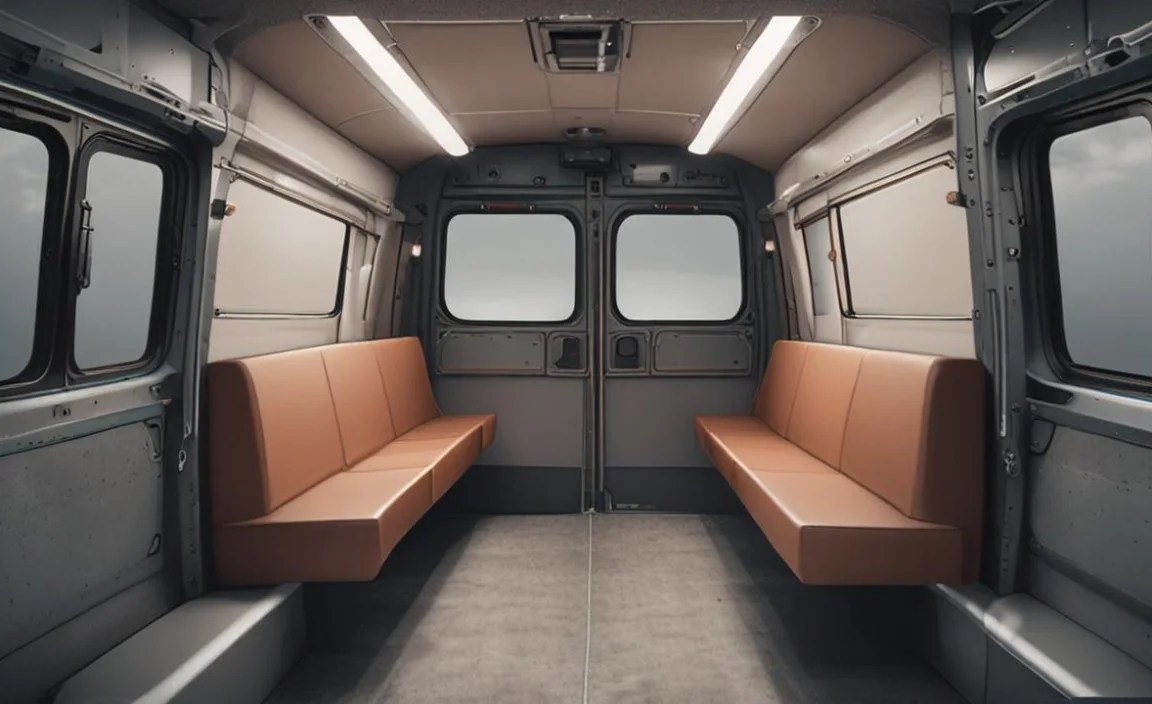
- Camper/Adventure Van: Emphasis on efficient storage for gear, water, food, and living necessities, with comfortable sleeping and cooking facilities.
- Mobile Business: Like a mechanic or a photographer, needing specialized equipment storage that is both protected and readily available.
Measure and Map:
Before buying or building anything, meticulously measure your van’s interior. Note the exact dimensions, including any wheel wells, irregularities in the body panels, and clearances. Sketch out your van’s interior and start drawing potential layouts for shelving, cabinets, and storage systems. Consider the flow of movement within the van – how will you access what you need?
Prioritize Accessibility and Security:
The most powerful optimization isn’t just about fitting more; it’s about fitting more usably. Items you use daily should be within easy reach. Heavy items should be secured low and centrally to maintain the van’s center of gravity. Less frequently used items can be stored higher or in less accessible spots.
Powerful Optimization Techniques
Once you have a clear plan, it’s time to implement the strategies that will transform your Sprinter’s cargo area.
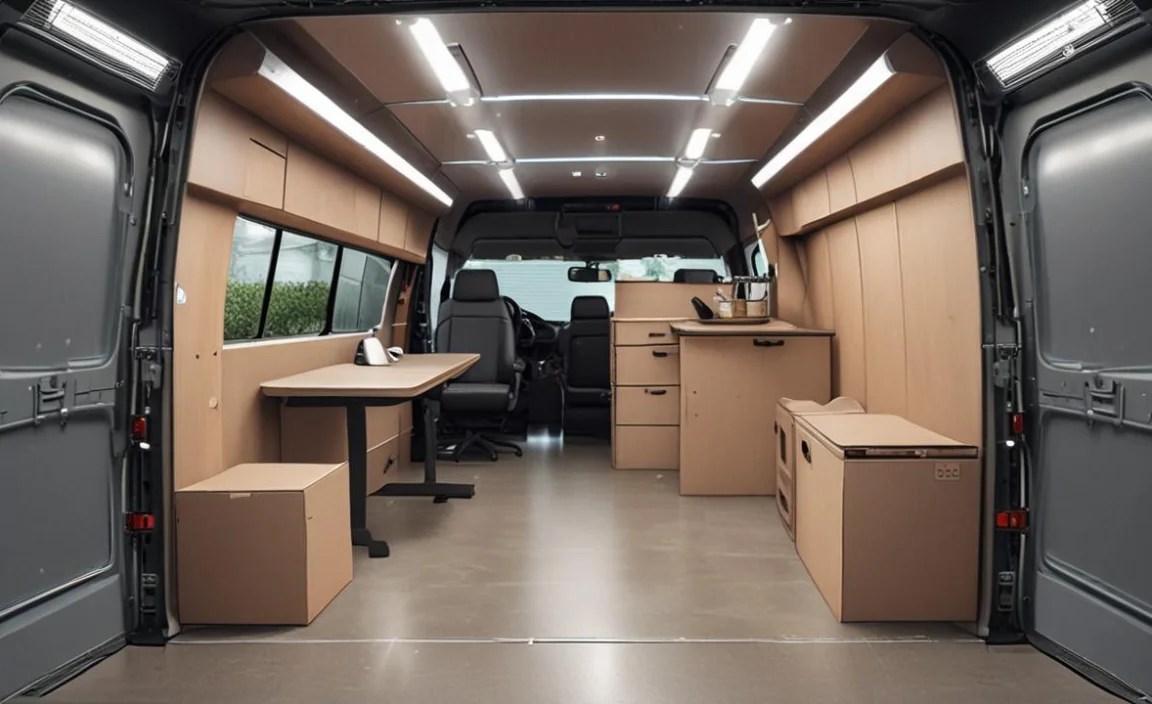
1. Master Vertical Storage: The Foundation of Power
The most significant untapped potential in any van is its vertical space. Utilizing the height of your Sprinter is non-negotiable for true optimization.
- Modular Shelving Systems: These are the workhorses. Reputable brands offer systems designed to bolt into your Sprinter, often utilizing existing mounting points. Companies like Rhino-Rack offer robust shelving solutions. These systems are typically made from strong, lightweight materials and can be configured in countless ways.
- Custom Built Shelving: For a truly bespoke fit, consider building your own. Plywood (such as Baltic Birch or Poplar for its strength and stability) is a popular choice for DIYers. Using construction-grade screws and wood glue will ensure durability. Consider adding a lip to shelves to prevent items from sliding off.
- Overhead Cabinets: These utilize the space above the driver and passenger seats, or along the side walls. They’re ideal for lighter items that don’t need frequent access, like camping gear, spare parts, or emergency supplies.
- Wall-Mounted Systems: Pegboards or Slatwall panels can offer flexible storage for tools and smaller items. These can be mounted with specialized brackets to the van’s interior walls.
2. Secure Tie-Down and Tracking Systems: The Backbone of Safety
Nothing is more critical than ensuring your cargo stays put. Loose items are a safety hazard and can damage your van’s interior. Tracking systems provide unparalleled flexibility.
- E-Track (or L-Track) Systems: These heavy-duty horizontal or vertical rails are bolted to your van’s floor, walls, or ceiling. They feature slots where you can insert a variety of accessories like snap hooks, tie-down straps, cargo nets, shelving brackets, and even specialized holders for equipment. Installation requires careful drilling and ensuring proper load-rated fasteners are used. The U.S. Department of Transportation provides guidelines on securing cargo that are worth reviewing.
- Factory Tie-Down Points (D-Rings): Your Sprinter likely came with D-ring tie-downs located in the floor or on the walls. These are excellent for strapping down mid-sized items, but their versatility is limited compared to E-track. They are crucial for larger, bulkier items.
- Cargo Nets and Straps: Essential companions to any tie-down system. Invest in high-quality, load-rated ratchet straps and durable cargo nets.
- Cargo Bars: These adjustable metal bars can be used to brace items against walls or other cargo, preventing forward or backward movement.
3. Drawer and Cabinet Solutions: Taming the Small Stuff
For smaller items, drawers and cabinets are essential for keeping things organized and tidy, preventing chaos.
- Full-Extension Drawer Slides: Invest in robust, full-extension drawer slides. These allow you to pull the drawer completely out, giving you full access to its contents. For heavier loads, heavy-duty slides are a must. The material for the drawers themselves can be plywood, or for a lighter option, aluminum.
- Modular Drawer Units: Many companies offer pre-fabricated modular drawer systems that can be installed in your van. These often fit perfectly into standard shelving units.
- Custom Cabinets: Build cabinets with doors to hide clutter, protect items from dust and UV light, and maintain a clean aesthetic. Magnetic or positive-latch hardware is vital to prevent doors from opening during transit.
- Tool Chests and Organizers: For trades, consider integrating professional-grade tool chests or specialized organizers that are securely fastened to the van’s structure.
4. Specialized Storage Solutions: Tailored Power
Beyond general shelving, consider purpose-built solutions for your specific needs.
- Underfloor Storage (for some van types): While less common in stock Sprinters, custom builds may incorporate underfloor storage, but this requires significant modification and engineering.
- Bike Racks and Mounts: If you’re a cyclist, integrated interior bike racks keep your bikes secure and out of the weather.
- Water Tank Storage: For camper vans, integrating secure, accessible water tank storage is critical.
- Propane Tank Mounts: Safe and secure mounting for propane tanks is a non-negotiable safety feature for cooking or heating.
- Tool-Specific Holders: Custom-cut foam inserts or purpose-built holders for specific tools can drastically improve organization and prevent damage.
5. Weight Distribution and Balance: Intelligent Power
How you load your Sprinter significantly impacts its handling, fuel economy, and tire wear. Optimizing cargo space also means optimizing weight distribution.
- Low and Central: Heavy items should always be placed as low as possible and as close to the center of the van as possible. This helps maintain a stable center of gravity.
- Even Side-to-Side: Try to distribute weight evenly between the driver’s and passenger’s sides to prevent the van from pulling.
- Consider Tire Load Ratings: Ensure your tires are rated to handle the maximum potential weight of a fully loaded Sprinter. Refer to your owner’s manual and tire sidewall information.
DIY vs. Professional Outfitting
The decision to build your own storage system or hire professionals is a significant one, often dictated by budget, time, and skill level.
DIY Advantages and Considerations:
- Cost Savings: Typically significantly cheaper than professional outfitting.
- Customization: You have complete control over the design and features.
- Learning Experience: A rewarding project for those who enjoy hands-on work.
- Time Commitment: Requires significant time for planning, purchasing, building, and installing.
- Skill Requirement: Basic carpentry, metalworking, and electrical skills may be needed depending on complexity.
- Potential for Mistakes: Errors can be costly or compromise safety if not addressed properly.
Professional Outfitters Advantages and Considerations:
- Expertise and Efficiency: Professionals have the knowledge and tools to create highly optimized, durable, and safe systems quickly.
- High-Quality Materials and Hardware: They often use specialized, lightweight, and strong materials and hardware.
- Professional Finish: The result is typically a cleaner, more polished build that can add resale value.
- Cost: Significantly more expensive than DIY.
-
Less Customization Control: While customizable, you are working within the outfitter’s design philosophy and offerings.
Essential Tools and Materials for DIY
If you’re embarking on a DIY build, having the right tools and materials will make the process smoother and the end result more professional.
Essential Tools:
- Measuring Tape (a good quality, long tape is invaluable)
- Pencil or Marker
- Safety Glasses
- Drill/Driver with various bits (including pilot bits and countersinks)
- Jigsaw or Circular Saw (for cutting wood)
- Miter Saw (highly recommended for accurate cuts on shelving)
- Orbital Sander
- Level
- Wrench set and socket set
- Caulking gun (for sealing)
- Metal Saw (if working with aluminum extrusions)
Common Materials:
- Plywood (1/2” or 3/4” Baltic Birch or Poplar are excellent choices)
- 2×4 or 2×3 lumber (for framing)
- Wood screws (various lengths, exterior grade recommended)
- Wood glue
- E-track or L-track rails (if using)
- Drawer slides (heavy-duty, full-extension)
- Hinges and latches for cabinets
- Paint or sealant (e.g., polyurethane, bed liner spray for durability)
- Rivnuts or threaded inserts (for secure mounting of tracks/components)
- Properly rated fasteners (for E-track, seat mounts, etc. – consult manufacturer specifications)
Maintenance and Longevity
Once your Sprinter is optimized, regular maintenance will ensure your investment lasts and continues to serve you well.
- Regularly Check Fasteners: Periodically inspect all bolted components, especially tracks and shelving supports, to ensure they are secure


