Mercedes Sprinter Camper Conversion Guide: Your Ultimate Dream
Your Mercedes Sprinter camper conversion dream is achievable with this comprehensive guide, breaking down the process into manageable steps for beginners. Learn how to transform your van into a cozy, functional home on wheels, covering everything from planning to final touches.
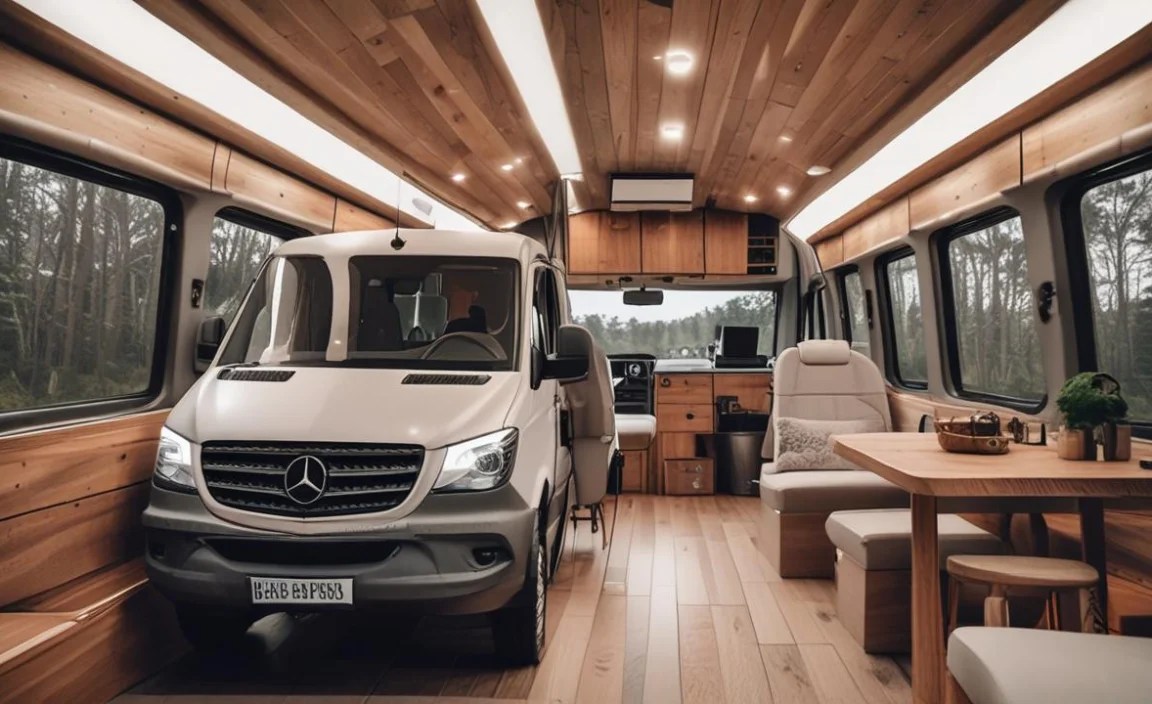
Imagine the freedom of the open road, the ability to wake up to new scenery every day, and the comfort of your own custom-built space. A Mercedes-Benz Sprinter van offers the perfect foundation for turning this dream into reality. These versatile vehicles are spacious, reliable, and provide a solid platform for any camper conversion. Whether you’re a seasoned DIYer or new to van life, this guide will walk you through the essential steps to creating your ultimate mobile abode with your Sprinter. Let’s start planning your adventure!
Why Choose a Mercedes Sprinter for Your Camper Conversion?

When embarking on a camper conversion, the vehicle you choose is paramount. The Mercedes-Benz Sprinter stands out for several compelling reasons, making it a top pick for aspiring van lifers. Its renowned reliability and engineering ensure that your adventures won’t be cut short by mechanical issues. Sprinters also boast impressive interior volume, offering more usable space for living quarters, storage, and amenities compared to many other van options. This generous space allows for creative layouts that can feel surprisingly home-like.
Furthermore, the Sprinter’s German engineering translates to a comfortable driving experience, which is crucial if you plan on covering long distances. They are available in various lengths and roof heights, providing flexibility to match your specific needs and desired layout. While the initial investment might be higher than some alternatives, the long-term value, fuel efficiency (for its class), and overall usability make the Sprinter an exceptional choice for a camper conversion that will stand the test of time and travel.
Phase 1: Planning Your Sprinter Camper Conversion

Before you even think about tools or materials, meticulous planning is the secret ingredient to a successful Sprinter camper conversion. This phase is where you lay the groundwork for everything that follows, ensuring your van meets your lifestyle needs and budget. Skipping this step can lead to costly mistakes and a less-than-ideal living space.
1. Define Your Van Life Style
Consider how you’ll use your camper van. Will it be for weekend getaways, extended cross-country trips, or full-time living? This will influence the design, required amenities, and complexity of your build. Think about:
- Travel Frequency & Duration: Short trips require less complex setups than full-time living.
- Destinations: Will you be boondocking in remote areas (requiring robust off-grid systems) or primarily using campgrounds (where hookups might be available)?
- Occupancy: How many people (and pets!) will typically be in the van?
- Essential Comforts: What are your non-negotiables? (e.g., a proper shower, a full-size bed, a dedicated workspace).
2. Choose the Right Sprinter Model
Mercedes-Benz offers Sprinters in various configurations, and your choice will significantly impact your build. Key factors include:
- Wheelbase: Shorter wheelbases (e.g., 118-inch, 144-inch) are more agile and easier to park but offer less living space. Longer wheelbases (e.g., 170-inch, 170-inch extended) provide maximum interior volume.
- Roof Height: High Roof models (often referred to as ESP or “extended super high roof”) are essential for standing inside, which greatly enhances comfort and usability. Standard Roof and Low Roof are less ideal for full-time living.
- Drivetrain: Rear-wheel drive (RWD) is standard and more affordable. All-wheel drive (AWD) is excellent for tackling challenging terrain or winter driving but adds complexity and cost.
- Year and Condition: Newer models offer modern features and better fuel efficiency, but a well-maintained older model can be a more budget-friendly option. Always get a pre-purchase inspection.
For a comfortable camper conversion, a high-roof Sprinter with a 144-inch or 170-inch wheelbase is generally recommended.
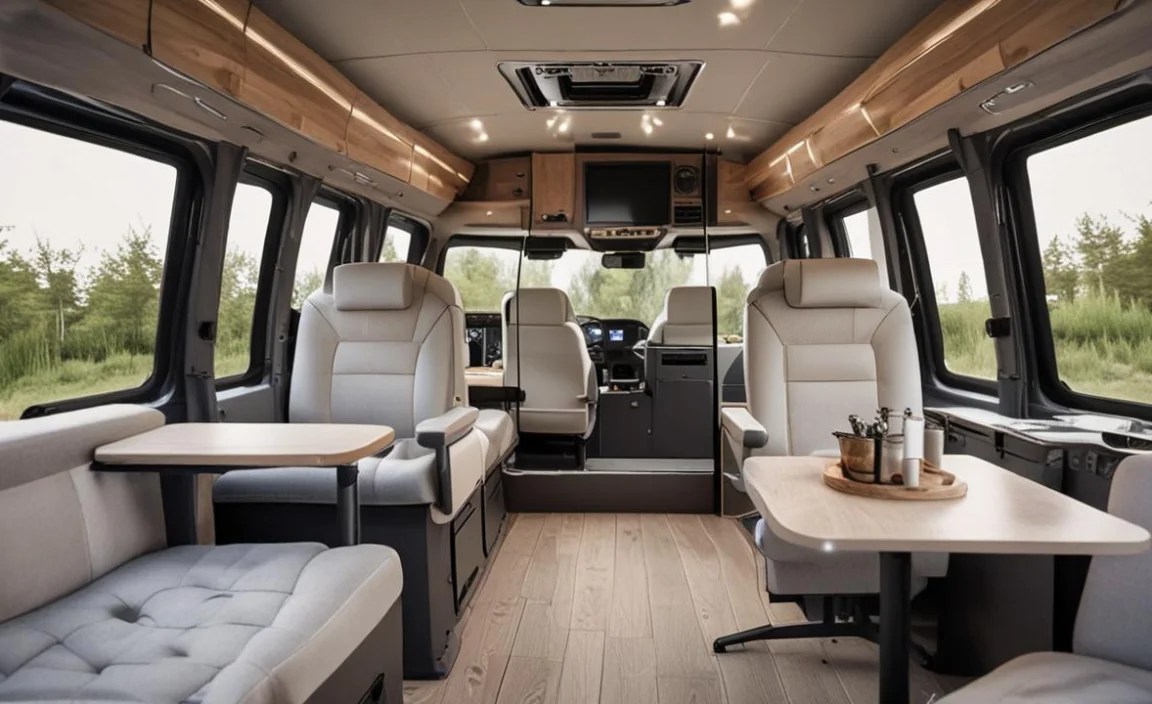
3. Design Your Layout
This is where your dream starts to take shape visually. Sketch your ideas, use online tools, or even cut out cardboard templates to represent furniture. Consider:
- Bed Placement: Fixed or convertible? North-south or east-west?
- Kitchen & Galley: Counter space, sink, stove, refrigerator.
- Seating Area: Dinette, lounging space, potential for a swivel seat for the driver/passenger.
- Bathroom/Wet Bath: A small, enclosed space for a toilet and shower.
- Storage: Crucial for van life! Think overhead cabinets, under-bed storage, and drawers.
- Water System: Fresh water tank, grey water tank, pump, water heater.
- Electrical System: Batteries, solar panels, inverter, shore power, outlets, lighting.
- Insulation & Ventilation: Essential for comfort in all weather.
There are many inspiring Sprinter conversion layouts available online, which can spark ideas. Websites like Gone With The Twins and Vanlife.com often feature detailed build diaries and floor plans.
4. Create a Detailed Budget
Van conversions can range from a few thousand dollars for a minimalist build to $50,000+ for a feature-rich luxury setup. Be realistic about costs:
- Van Purchase Price: The biggest initial investment.
- Materials: Wood, insulation, flooring, paneling, fasteners.
- Systems: Electrical components (solar, batteries, inverter), plumbing (tanks, pump, heater), appliances (fridge, stove).
- Tools: What do you already own, and what do you need to buy or rent?
- Contingency Fund: Always set aside 10-20% for unexpected expenses.
A detailed spreadsheet listing every anticipated item and its cost is invaluable.
5. Gather Your Tools and Materials
Once your plan is solid, start acquiring tools and materials. Prioritize essential tools for safety and efficiency. For a basic build, you’ll likely need:
- Measurement: Tape measure, carpenter’s square, level.
- Cutting: Circular saw, jigsaw (with various blades for wood and metal), handsaw.
- Drilling: Power drill with various bits for wood, metal, and pilot holes. Spade bits or hole saws for larger openings (e.g., vents, electrical).
- Fastening: Screwdrivers, impact driver, wrenches, rivet gun.
- Safety: Safety glasses, work gloves, dust mask, ear protection.
- Electrical Tools: Wire strippers, crimpers, multimeter.
- Plumbing Tools: PEX crimping tool (if using PEX), pipe cutter.
For materials, think about sustainable and lightweight options where possible. Research different types of insulation (e.g., Havelock Wool, Thinsulate, foam board), wood for framing and paneling (e.g., poplar, Baltic birch plywood), and flooring (e.g., vinyl plank, cork).
Phase 2: The Conversion Process
With the planning complete, it’s time to get your hands dirty. This phase is the core of the build, transforming your empty Sprinter into a functional living space. Remember to work systematically and prioritize safety at every step.
1. Strip Down and Clean the Van
Start by removing any existing flooring, wall panels, or cargo tie-downs that won’t be part of your finished build. Thoroughly clean the interior, including removing any rust spots. A clean surface is essential for proper adhesion of insulation and paneling.
2. Sound Deadening and Rust Proofing
Before insulating, apply sound-deadening material (like Dynamat or Kilmat) to large metal panels, especially the floor, roof, and doors. This significantly reduces road noise and creaks. Address any rust spots with a rust converter and primer to prevent future problems. This critical step, often overlooked by beginners, makes a huge difference in driving comfort.
3. Insulation and Vapor Barrier
Proper insulation is key to year-round comfort. It keeps the van warm in winter and cool in summer, drastically reducing reliance on heaters or air conditioning. Popular options include:
- Fiberglass/Wool: Natural, effective, and breathable.
- Foam Board (e.g., XPS, Polyiso): Rigid, good R-value, can also serve as a vapor barrier.
- Spray Foam: Excellent for filling gaps and creating a sealed environment, but can be difficult to remove or modify later.
- Thinsulate: Lightweight and effective, often used in high-end builds.
Install your chosen insulation in all walls, the ceiling, and the floor. Follow this with a vapor barrier (e.g., plastic sheeting) if your insulation isn’t inherently a vapor barrier. This protects against condensation buildup.
For more detailed information on insulation types and their R-values (a measure of thermal resistance), the U.S. Environmental Protection Agency (EPA) offers some insightful articles on general insulation principles that can be applied here: Energy Star – Insulation.
4. Subfloor and Flooring Installation
Lay down a subfloor, typically using plywood, over your insulation. This provides a solid, flat base. Then, install your chosen finished flooring (e.g., vinyl plank, laminate, cork). Ensure the flooring is durable and water-resistant.
5. Framing Walls and Ceiling
Build a wooden frame (or lightweight metal studs) for your interior walls, cabinets, and bed platform. This framework will support paneling and fixtures. Use lightweight wood like poplar or thin Baltic birch plywood to save weight. Pre-drill holes and use appropriate screws for a secure fit.
6. Wiring and Electrical System
This is often the most intimidating part for beginners. Plan your electrical system carefully. You’ll need:
- House Batteries: Deep-cycle batteries (e.g., AGM, Lithium-ion) to power your amenities.
- Solar Panels: To charge your house batteries.
- Charge Controller: Regulates power from solar panels to batteries.
- Shore Power Inlet: To connect to campground power.
- Inverter: Converts DC battery power to AC power for standard appliances.
- Fuses & Breakers: Essential safety components.
- Wiring: Appropriate gauge wire for all connections.
Consider hiring an electrician if you’re uncomfortable with this, or thoroughly research and use diagrams. Mobile Solar Fuel provides excellent resources for calculating solar power needs.
7. Plumbing System
Install your fresh water tank, grey water tank (for wastewater), water pump, and water heater. Run PEX tubing for water lines, which is flexible and easier to install than traditional copper piping. Install your sink, faucet, and shower head. Ensure all connections are leak-proof.
8. Installing Appliances and Fixtures
Mount your refrigerator, stove/cooktop, fan (e.g., MaxxAir fan for ventilation), toilet, and any other appliances. Ensure they are securely fastened and have proper ventilation, especially for propane appliances. Install interior lights, outlets, and switches.
9. Interior Paneling and Finishing
Cover your interior walls and ceiling with paneling. Plywood, shiplap, or even fabric-wrapped panels are popular choices. Sand and finish the wood as desired – stains, paints, or clear coats. Install trim, cabinetry doors, and hardware for a polished look.
Table of Common Electrical Components
| Component | Purpose | Considerations |
|---|---|---|
| House Batteries | Store electrical energy for living systems. | Type (Lead-acid, AGM, Lithium), Capacity (Ah), Voltage. |
| Solar Panels | Generate electricity from sunlight. | Wattage, Monocrystalline vs. Polycrystalline, Flexible vs. Rigid. |
| Charge Controller | Manages solar panel output to charge batteries safely. | MPPT vs. PWM, Amperage rating. |
| Inverter | Converts DC battery power to AC household power. | Wattage rating (continuous and surge), Pure Sine Wave is best for sensitive electronics. |
| Shore Power Inlet | Connects to external power sources (campgrounds). | Amperage (e.g., 30A), weather-resistant. |
| Fuses/Circuit Breakers | Protect electrical components from overcurrent. | Correct amperage rating for each circuit. |
10. Final Touches and Testing
Install any remaining interior elements like cushions, curtains, or shelving. Test all your systems thoroughly: electrical, plumbing, and gas. Check for leaks in the water system, ensure all lights and outlets work, and that your appliances are functioning correctly.
Essential Sprinter Camper Conversion Tips for Beginners
Embarking on your first Sprinter conversion can feel daunting. Here are some key tips to help you navigate the process with confidence and avoid common pitfalls.
1. Start Simple
Your first build doesn’t need to be a luxury RV straight out of the gate. Focus on the essentials: a comfortable bed, basic cooking facilities, and reliable power. You can always upgrade or add features later as you gain experience and understand your needs better.
2. Prioritize Weight Savings
Every pound counts in a van conversion. Excess weight affects fuel economy, handling, and can even lead to suspension issues. Opt for lightweight materials where possible without sacrificing durability. For instance, use thinner plywood for paneling and cabinets, and consider composite materials.
3. Ventilation is Key
Proper ventilation is crucial for comfort and preventing moisture buildup, which can lead to mold and structural damage. Ensure you have adequate airflow with at least one roof vent (like a MaxxAir fan) and consider opening windows or adding a second vent. The Department of Energy has valuable information on the importance of ventilation in enclosed spaces.
4. Do Your Research on Electrical Systems
Electrical setups can be complex and dangerous if done incorrectly. Dedicate significant time to understanding DC power, battery banks, solar charging, and inverter sizing. Consult reputable online resources and consider seeking advice from professionals if you’re unsure.
<h3


