Mercedes Sedan Chrome Delete: Perfect Styling
Quick Summary
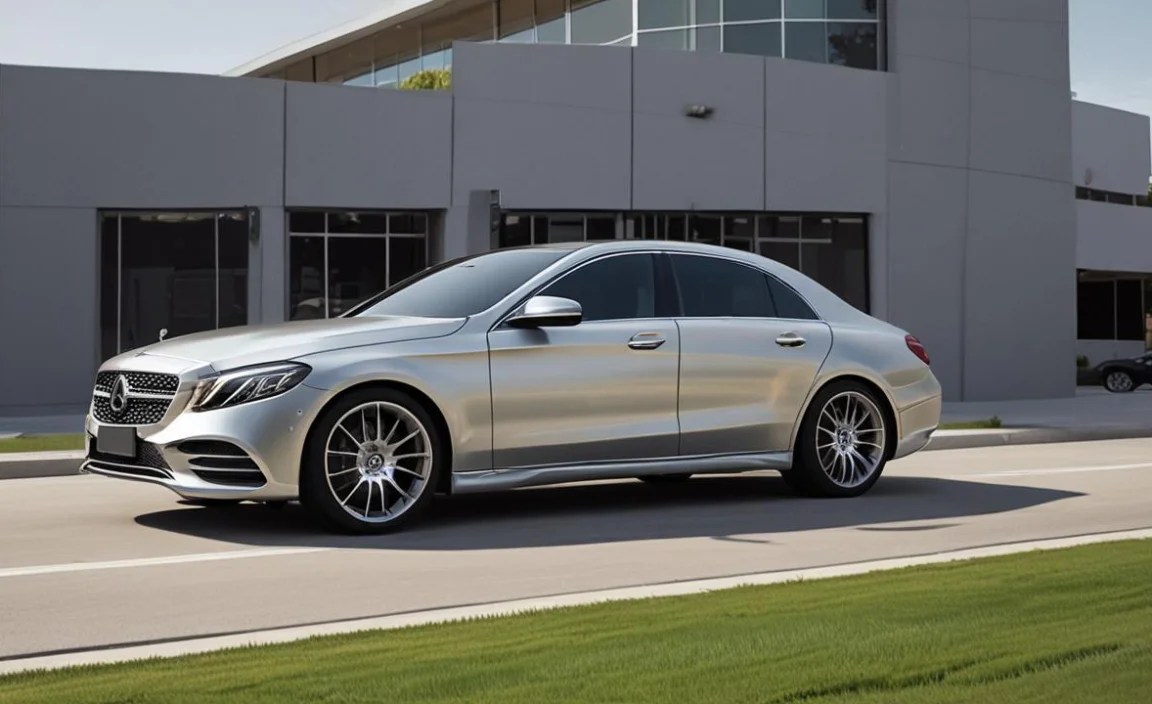
Mercedes sedan chrome delete offers a sleek, modern look by replacing shiny chrome trim with a matte black finish. This DIY-friendly upgrade enhances your car’s aesthetic, provides protection, and is a reversible modification for a personalized Mercedes-Benz styling.
Welcome to MercedesBlue! If you own a Mercedes sedan, you likely appreciate its refined design and luxurious details. However, some owners find the abundance of chrome trim—around the windows, grille, or badges—a bit dated for a contemporary aesthetic. This is where the “chrome delete” comes in. It’s a popular styling mod that transforms your Mercedes, giving it a stealthier, more aggressive, or simply cleaner appearance. This guide will walk you through everything you need to know about Mercedes sedan chrome delete, from understanding what it is to achieving that perfect, personalized look for your prized vehicle.
We’ll cover why so many Mercedes owners choose this modification, the different methods available, and how to achieve a professional finish. Whether you’re considering a full chrome delete or just targeting specific accents, you’ll have the knowledge to make informed decisions. Let’s dive in and explore how to elevate your Mercedes’ style!
What Exactly is Mercedes Sedan Chrome Delete?

At its core, “chrome delete” refers to the process of covering or replacing the shiny chrome exterior accents on your Mercedes sedan with a different, typically darker, finish. Most commonly, this means applying a matte, satin, or gloss black vinyl wrap or a specialized black chrome vinyl over the existing chrome pieces. The goal is to achieve a more uniform, monochromatic look that can dramatically alter the car’s personality.
Think of it as a visual palate cleanser. The bright, reflective nature of chrome can sometimes feel a bit flashy for modern automotive design trends, which often lean towards more subdued and integrated styling. Chrome delete allows owners to dial back that inherent shine and achieve a more sophisticated, understated, or performance-oriented aesthetic, aligning the car’s appearance with a sportier or more aggressively styled vision.
Why Do Mercedes Owners Opt for Chrome Delete?
The appeal of chrome delete for Mercedes sedan owners is multifaceted:
- Modern Aesthetics: It instantly updates the car’s look, making it appear more contemporary and less “blingy.” Many find the all-black or dark trim enhances the car’s body lines and aggressive stance.
- Personalization: It’s a relatively simple yet effective way to personalize your Mercedes, making it stand out from other models on the road.
- Subtle Performance Look: Blacked-out trim is often associated with performance vehicles and aftermarket tuning, giving the car a sportier, more aggressive aura.
- Protection: The vinyl wrap used for chrome delete can offer a layer of protection to the original chrome trim against minor scratches, chips, and environmental damage.
- Reversibility: Unlike permanent paint or removal, vinyl wrapping is a non-permanent modification. If you decide to sell your car or change your mind, the wrap can usually be removed without damaging the original chrome.
- Cost-Effectiveness: Compared to replacing chrome trim with blacked-out OEM parts or custom finishes, a vinyl wrap is often a more budget-friendly option.
Common Areas for Chrome Delete on Mercedes Sedans

While you can technically delete chrome anywhere, certain areas are far more popular and impactful for this modification on Mercedes sedans:
| Trim Area | Description | Styling Impact |
|---|---|---|
| Window Trim (Beltline Trim) | The chrome strip running along the bottom edge of all side windows. | Dramatically changes the perceived darkness and sportiness of the cabin. A very common first step. |
| Grille Surround/Accents | The chrome frame around the grille or the vertical/horizontal bars within it. | Can make the front end look more aggressive and focused. |
| Badges & Emblems | The Mercedes-Benz star, model designation (e.g., C300, E450), and AMG badges. | Creates a cleaner, more uniform appearance, particularly popular for “debadging” effects. |
| Front/Rear Splitters & Diffusers | Lip spoilers, diffuser elements, or accent pieces, often found on sportier trims. | Adds a subtle, integrated performance look. |
| Door Handles | The chrome caps or inserts on door handles. | Contributes to an all-black, stealthy side profile. |
| Fuel Door | The chrome trim around the fuel filler cap. | A smaller detail that can complete the monochromatic theme. |
Methods for Achieving Chrome Delete
There are a few primary ways to achieve a chrome delete on your Mercedes sedan, each with its own pros and cons:
1. Gloss, Satin, or Matte Black Vinyl Wrapping
This is by far the most popular and accessible method for chrome delete. High-quality automotive vinyl is applied directly over the existing chrome trim. It’s a versatile, cost-effective, and reversible solution.
Pros:
- Versatility: Available in a vast array of finishes (gloss, satin, matte, carbon fiber, even textured blacks) and colors.
- Cost-Effective: Generally the most affordable option, especially for DIY.
- Reversibility: Can be removed relatively easily without damaging the original trim underneath, preserving the car’s resale value.
- Protection: Offers a layer of protection against scratches and minor chips.
- DIY Friendly: With patience and the right tools, many chrome pieces can be wrapped by enthusiastic owners.
Cons:
- Durability: While good quality vinyl lasts years, it’s not as permanent as paint or powder coating and can be susceptible to damage from harsh chemicals or aggressive washing.
- Installation Skill: Complex curves and tight edges require skill and practice for a flawless finish. Mistakes can lead to bubbles, lifting, or an unprofessional appearance.
- Longevity: Cheaper vinyl can fade, crack, or lose its adhesive properties over time, especially in extreme climates.
2. Professional Painting
This involves removing the chrome trim, prepping it, and then painting it with a specialized automotive paint, often in satin or matte black. Some might even opt for gloss black for a more seamless look with blacked-out window trim.
Pros:
- Durability: Properly applied automotive paint is very durable and long-lasting.
- Seamless Finish: Can achieve a factory-like, integrated look.
- Permanent: A permanent solution for those who are certain about their aesthetic choice.
Cons:
- Cost: Significantly more expensive than vinyl wrapping due to labor and materials.
- Non-Reversible: Once painted, it’s difficult and costly to revert to chrome.
- Risk of Damage: Removal of trim can be difficult and may risk breaking clips or damaging paintwork if not done expertly.
- Less Customization: Limited to paintable finishes, so exotic textures or finishes are not possible.
3. Black Chrome or Dark Chrome Vinyl (Alternative to Full Delete)
Instead of a true “delete” to black, some owners opt for a dark chrome or black chrome vinyl. This offers a subtle metallic sheen that is darker than standard chrome but still has a reflective quality.
Pros:
- Unique Look: Offers a less common, sophisticated alternative to matte black.
- Maintains Some Shine: For those who don’t want a completely flat black look.
- Reversible: It’s still a vinyl wrap, so it’s removable.
Cons:
- Limited Options: Fewer manufacturers and finishes available compared to standard black vinyl.
- Cost: Can sometimes be slightly more expensive than standard black vinyl.
- Visual Matchups: Can sometimes be tricky to match with other black trim elements (e.g., gloss black wheels).
DIY Chrome Delete: A Step-by-Step Guide

For the enthusiast looking to tackle this themselves, vinyl wrapping is the most accessible DIY method. Here’s a general breakdown of how to wrap window trim, which is a common starting point.
Tools and Materials You’ll Need:
- Automotive Vinyl Wrap: High-quality, conformable vinyl in your chosen finish (e.g., 3M 1080/2080, Avery Dennison SW900) – measure your trim carefully to estimate how much you’ll need.
- Cutting Blade/Knife: A sharp, precision craft knife or a specialized wrap knife with a fine blade.
- Squeegees: A set of felt-edged squeegees (e.g., application squeegee, mini squeegee).
- Heat Gun or Hair Dryer: Essential for stretching and conforming the vinyl. A proper wrap heat gun offers better temperature control.
- Rubbing Alcohol (Isopropyl Alcohol): For cleaning the surface thoroughly.
- Microfiber Towels: For cleaning and drying.
- Primer Pen (e.g., 3M Primer 94): Helps with adhesion on edges and deep curves.
- Masking Tape: To protect adjacent paintwork if needed.
- Gloves: To keep vinyl clean from fingerprints.
- Measuring Tape.
Step-by-Step Process:
- Clean the Trim Thoroughly: This is the most critical step. Wash the chrome trim and surrounding area. Then, use rubbing alcohol to degrease the surface completely. Any dirt, wax, or residue will prevent the vinyl from adhering properly. Your goal is a perfectly clean, dry surface.
- Measure and Cut the Vinyl: Cut a piece of vinyl wrap that is significantly larger than the trim piece you intend to cover. Allow for at least 2-3 inches overlap on all sides.
- Position the Vinyl: Carefully lay the vinyl over the chrome trim. Start by tacking down one end.
- Apply Heat and Stretch: Gently heat the vinyl with your heat gun or hair dryer. As it becomes pliable, begin to squeegee it down onto the trim, working from the center outwards. Heat allows the vinyl to stretch and conform to the shape. Use smooth, overlapping strokes with your squeegee.
- Tuck and Seal Edges: As you work along the trim, you’ll need to tuck the vinyl into corners and around curves. Applying heat will make the vinyl stretchy, allowing you to pull it taut without tearing. Use a primer pen along edges and deep channels for enhanced adhesion.
- Trim Excess Vinyl: Once the vinyl is smoothly applied and conforms to all the contours, use your sharp knife to carefully trim away the excess vinyl. For window trim, you often trim flush with the rubber seal or tuck it underneath. Use a gentle, consistent pressure to avoid cutting into the underlying trim material or paint.
- Post-Heating: After trimming, lightly go over the edges and seams with your heat gun one last time. This “sets” the vinyl and helps the adhesive bond permanently.
- Inspect and Repeat: Carefully inspect your work for any bubbles, lifting, or imperfections. Repeat the process for all chrome trim pieces you wish to cover.
For more intricate parts like badges, it’s often easier to remove them, wrap them flat, and then reapply them using automotive double-sided tape. For larger sections, professional installation might be recommended for a flawless show-car finish.
Tips for a Flawless Finish:
- Work in a clean, well-lit environment, preferably indoors or out of direct sunlight and wind.
- Take your time. Rushing leads to mistakes.
- Use a sharp blade. A dull blade will drag and create an uneven cut.
- Don’t over-stretch the vinyl, especially with gloss finishes, as it can distort the color or cause stress to the adhesive.
- Watch professional installation videos for the specific type of trim you are working on. Resources like this comprehensive tutorial on wrapping car trim from a reputable source can be invaluable.
- Practice on a less visible area or a scrap piece of trim first.
Vinyl Wrap Durability and Maintenance

Once your Mercedes sedan boasts its fresh chrome delete, maintaining that pristine look is key. Most reputable automotive vinyl wraps are designed to last anywhere from 3 to 7 years, depending on the quality of the material, installation, and how the car is cared for.
Caring for Your Wrapped Trim:
- Gentle Washing: Use a mild car soap and water. Avoid abrasive brushes or harsh chemicals.
- Avoid High-Pressure Washing Directly on Edges: While the vinyl is durable, prolonged direct high-pressure spray on the edges can lift them.
- No Solvents or Harsh Cleaners: Stick to pH-neutral car care products. Solvents can degrade the vinyl and adhesive.
- Hand Dry: After washing, gently dry with a clean microfiber towel.
- Be Mindful of Ice Scrapers: In colder climates, avoid using ice scrapers directly on the wrapped trim.
Proper care ensures your chrome delete remains looking sharp and extends the lifespan of the wrap, keeping your Mercedes sedan styled to perfection for years to come.
Beyond Black: Exploring Other Chrome Delete Options
While black is the undisputed king of chrome delete finishes, it’s not the only option. For those seeking something different, consider:
- Carbon Fiber Vinyl: Creates a sporty, high-performance look that mimics real carbon fiber. Available in various weaves and finishes.
- Satin/Matte Silver or Grey: For a more subtle, sophisticated contrast that still breaks up the chrome without going fully dark.
- Color-Matched Vinyl: While less common for trim, some owners wrap trim in a color that subtly matches or complements their car’s paint.
The choice ultimately depends on your personal style and the overall aesthetic you aim to achieve for your Mercedes sedan. The beauty of vinyl is its reversibility, allowing you to experiment and change your mind.
Aesthetic Considerations: Blacked Out vs. De-chromed
When people talk about “chrome delete,” they usually mean replacing shiny chrome with a black finish. However, the spectrum of “blacked out” exists.
- Full Chrome Delete (Matte/Satin Black): This is the most aggressive and stealthy look. It creates a unified, monochromatic appearance, often making the car look lower and sportier. This is excellent for owners who want a modern, understated elegance or a motorsport-inspired vibe.
- Gloss Black Wrap: This offers a sleeker, more integrated look. It can sometimes blend seamlessly with other gloss black elements on the car, like window trim or wheels. It maintains a hint of shine, making it a sophisticated choice.
- Dark Chrome/Black Chrome: As mentioned, this is a subtler approach. It retains some reflectivity and metallic sheen, offering a premium, less stark alternative to matte black. It’s a taste of the darker aesthetic without going fully “blacked out.”
- Partial Chrome Delete: Some owners only choose to delete chrome on certain areas. For instance, they might wrap the window trim black but leave the grille or badges in chrome for a more balanced look, or vice-versa.
The ideal choice depends heavily on the specific Mercedes sedan model and its existing design cues. For example, a sporty AMG model might look fantastic with a full matte black delete, while a more luxurious S-Class might better suit a gloss black or dark chrome treatment.
Cost Breakdown: DIY vs. Professional Installation
The expense of chrome delete can vary significantly. Here’s a general idea:
| Method | Material Cost (DIY) | Professional Installation Cost | Notes |
|---|---|---|---|
| Vinyl Wrapping (Trim) | $30 – $100 (depending on vinyl quality and amount) | $300 – $800+ (depending on the amount of trim, complexity, and shop rates) | DIY saves money but requires time and skill. Professional ensures a flawless finish. |
| Painting (Trim) | N/A (Requires specialized equipment/skills) | $600 – $1500+ (depending on trim complexity, prep work, and finish) | Permanent, durable, but expensive and irreversible. |
For most Mercedes sedan owners embarking on a chrome delete project, vinyl


