Mercedes-Benz C Class Camera Install: Ultimate Luxury Fit
Achieving a seamless, factory-fresh integration of advanced camera systems brings enhanced safety and convenience to your luxury sedan. This guide provides a beginner-friendly, step-by-step process for a professional-quality finish.
Driving your Mercedes-Benz C-Class is an experience of refined comfort and cutting-edge technology. Sometimes, however, you might wish for an extra set of eyes on the road or around your vehicle – perhaps a dashcam for peace of mind or a backup camera for effortless parking. Integrating aftermarket cameras into a sophisticated luxury vehicle like the C-Class can seem daunting, with concerns about preserving the pristine interior and ensuring flawless functionality.
Worry not! This guide is designed to demystify the process, transforming a potentially complex task into an achievable project. We’ll walk you through everything you need to know for a C Class camera install that looks and performs like it was designed by Mercedes-Benz itself.
By the end of this guide, you’ll feel confident in understanding the options available, the tools required, and the precise steps to ensure a professional, integrated look for your C-Class camera system. Let’s get started on enhancing your driving experience!
Why Consider a C Class Camera Install?
Enhancing your C-Class with a camera system goes beyond mere aesthetics; it’s a smart upgrade for safety, security, and convenience. Whether it’s a forward-facing dashcam to document your journeys and protect you in case of an accident, or a rear-view camera to make parking in tight spots a breeze, the benefits are substantial.

- Enhanced Safety: Dashcams provide crucial evidence in the event of a collision, potentially saving you time, money, and hassle. Backup cameras significantly reduce the risk of backing into obstacles or people.
- Increased Security: Some dashcams can monitor your car while parked, deterring vandalism and capturing any incidents that occur when you’re not present.
- Parking Assistance: A clear view behind your vehicle transforms tricky parking maneuvers into simple, stress-free operations.
- Documenting Journeys: For those who love road trips or scenic drives, a dashcam can be a fantastic way to capture memories.
- Peace of Mind: Knowing you have an extra layer of protection and awareness can make every drive more relaxed.
Understanding C Class Camera Options
The term “camera install” for a C-Class can refer to several different types of systems. Understanding these will help you choose the right one for your needs and budget.
1. Dash Cams
These are perhaps the most popular type of camera for vehicles. They mount to your windshield and record the road ahead. Many advanced models also offer dual-channel recording (front and rear), parking modes, and GPS logging.
2. Backup/Reversing Cameras
While many newer C-Class models come with integrated backup cameras, older models or those without this feature can benefit greatly from an aftermarket installation. These cameras activate when you shift into reverse, displaying a clear image on your infotainment screen.
3. 360° Camera Systems (Bird’s-Eye View)
These are the most comprehensive camera systems, utilizing multiple cameras (front, rear, and sides) to create a simulated top-down view of your vehicle and its surroundings. They are invaluable for navigating complex parking lots and tight spaces.
4. Integrated Systems
Some high-end dashcam systems are designed to integrate seamlessly with your car’s interior, often replacing the rearview mirror or using discreet mounting solutions. The goal is a “factory fit” look.
Tools and Materials for a Professional C Class Camera Install
A clean, professional installation requires the right tools. Having these on hand will make the process smoother and ensure a higher quality finish. For specific tools recommended by automotive professionals, a resource like SEMA (Specialty Equipment Market Association) provides extensive industry insights into best practices and essential equipment.

- Trim Removal Tools: Plastic pry tools are essential to safely remove interior trim panels without scratching or damaging them.
- Wire Strippers & Crimpers: For securely connecting wires if any splicing is necessary.
- T-Taps or Add-a-Circuit Fuse Taps: To tap into existing car circuits for power without cutting factory wires.
- Electrical Tape or Heat Shrink Tubing: For insulating wire connections.
- Zip Ties: To secure wiring neatly and prevent it from dangling or interfering with moving parts.
- Multimeter: To test for power and ground in various wire locations.
- Screwdrivers (Phillips and Flathead): Standard tools for removing screws holding panels in place.
- Torx Bits: Many Mercedes-Benz vehicles use Torx screws, so having a set is crucial.
- Wire Hiding Tools: Such as a fish tape or a thin, flexible rod can help guide wires through tight spaces.
- C Class Specific Wiring Harness/Adapter (Optional): Some advanced dashcams offer specific adapters for Mercedes-Benz vehicles, simplifying the connection process.
- The Camera System Itself: Ensure you have all components, manuals, and mounting hardware.
Step-by-Step: C Class Camera Install Guide (Dash Cam Example)
This guide focuses on installing a common front-facing dashcam. The principles can be adapted for other camera types, but always refer to your specific camera’s manual for detailed instructions.

IMPORTANT: Before starting any electrical work on your vehicle, it is highly recommended to disconnect the negative terminal of your car battery. This prevents accidental shorts and protects the vehicle’s sensitive electronics. Consult your C-Class owner’s manual for the exact procedure.
Step 1: Planning the Dash Cam Placement
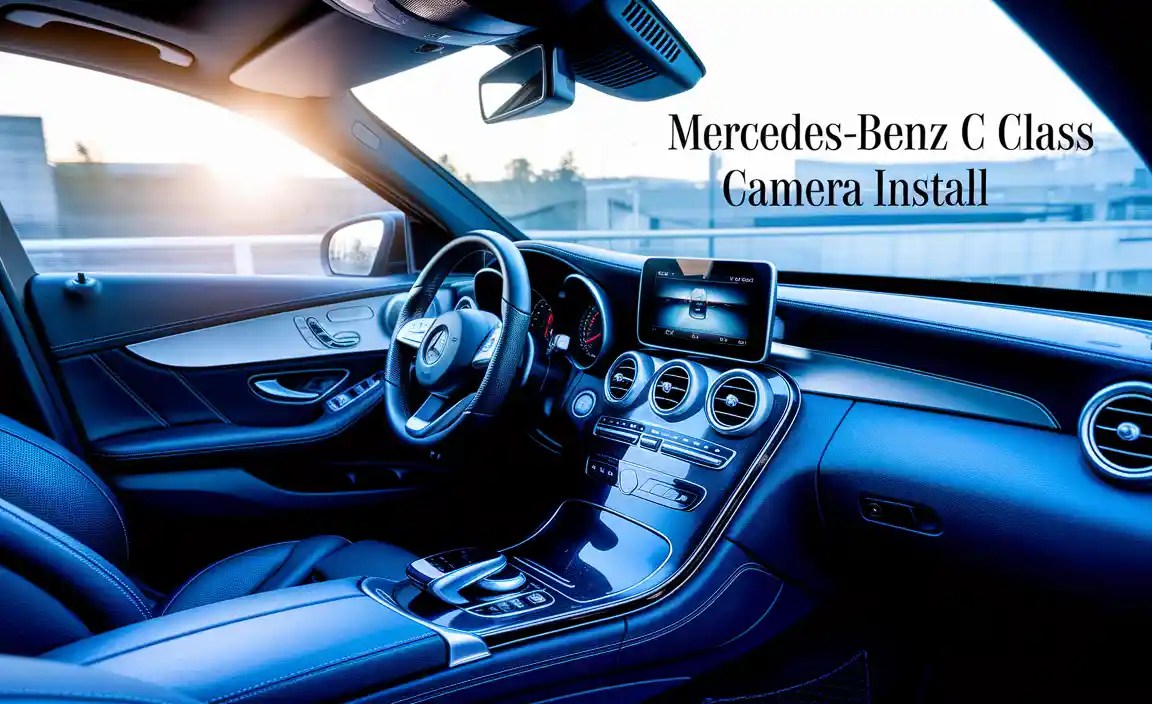
The goal for a luxury fit is discretion. Most dashcams can be mounted behind the rearview mirror. This placement keeps the camera out of your direct line of sight and is less conspicuous from outside the vehicle.
- Clean the area on the windshield where the camera will be mounted with an automotive-safe glass cleaner.
- Most dashcams use adhesive mounts. Carefully peel off the protective backing and firmly press the camera mount onto the glass for the recommended duration (usually 30-60 seconds).
- Ensure the camera lens is unobstructed.
Step 2: Routing the Power Cable
This is where neatness significantly impacts the “luxury fit.” You want to hide the power cable as much as possible.
- Windshield Channel: Many C-Classes have a channel or seam above the windshield where wiring can be discreetly tucked. Use your trim removal tools to gently pry open the edge of the headliner panel near the windshield pillar.
- Pillar Cover Removal: Carefully remove the A-pillar trim (the panel covering the front windshield pillar). This often involves releasing clips. Be gentle, as these can be brittle. Guide the wire down behind the A-pillar cover.
- Under the Dashboard: Run the cable from the A-pillar down along the dashboard’s edge, tucking it into the seams between panels.
- Accessing the Fuse Box: In a C-Class, the fuse box is often located under the dashboard or on the side of the passenger footwell. Consult your owner’s manual for its precise location.
Step 3: Connecting to Power
This is a critical step for a clean install. You want the camera to turn on and off with the ignition.
- Locate an Ignition-Switched Fuse: Using your multimeter, identify a fuse slot in the fuse box that receives power only when the ignition is in the “Accessory” or “On” position.
- Use an Add-a-Circuit Fuse Tap: Connect the dashcam’s power wire to an Add-a-Circuit fuse tap. This device allows you to safely tap into an existing fuse circuit. Plug the original fuse for that circuit into the first slot of the tap, and the fuse for the dashcam into the second slot.
- Ground Connection: Find a clean, bare metal point on the car’s chassis for the ground wire. This is essential for the camera to function correctly. Often, there’s a suitable bolt or screw mount readily available.
- Connect ACC Power: Connect the positive wire from the dashcam (or its power adapter) to the wire on the fuse tap that will receive power from the ignition-switched fuse.
External Resource: For detailed guidance on automotive fuse boxes and identifying circuits, resources from automotive electrical specialists like Pigtou.com offer valuable insights.
Step 4: Concealing Remaining Wires and Reassembly
The key to a luxury fit is making the wiring invisible.
- Tuck any excess wire neatly under the dashboard, securing it with zip ties to existing looms or structural elements so it doesn’t rattle.
- Carefully re-clip the A-pillar trim and any previously removed dashboard panels. Ensure all clips engage properly for a factory finish.
- Route the remaining power cable along the headliner towards the rearview mirror, again tucking it into the seam.
- Connect the power cable to the dashcam.
Step 5: Testing the Installation
Before you finalize everything, it’s crucial to test.
- Reconnect the negative battery terminal.
- Turn the ignition key to the “Accessory” position. The dashcam should power on.
- Turn the ignition off. The dashcam should power down or enter parking mode (if equipped and configured).
- Check the recording function and any other features as per the dashcam’s manual.
Camera Install Considerations for Different C Class Models
While the general principles remain the same, the exact interior layouts and electrical systems can vary slightly between C-Class generations (e.g., W204, W205, W206).

| C-Class Generation | Fuse Box Location | Headliner Access | Potential Challenges |
|---|---|---|---|
| W204 (2007-2014) | Driver’s side footwell, behind kick panel. | Generally accessible, may require careful prying. | Older electronics may be less forgiving of power fluctuations. |
| W205 (2014-2021) | Passenger side footwell, under dash or side panel. | Well-hidden channels, good for discreet routing. | More complex integrated electronics. |
| W206 (2021 onwards) | Can vary; often passenger footwell or center console. | Sophisticated interior panels, requires extra care with trim tools. | Advanced CAN bus systems; ensure compatibility of power taps. |
Always consult a C-Class specific forum or workshop manual for your exact model year. For instance, resources dedicated to Mercedes-Benz technology, such as the forums on MBWorld.org, are invaluable for model-specific installation tips.
Integrating Rearview or 360° Cameras
Installing rear or 360° cameras often involves more complex routing, as cables need to travel from the front of the car to the rear tailgate or bumper. This can also involve interfacing with the vehicle’s infotainment system.
- Power: These cameras typically tap into reverse light circuits for power (they only need power when reversing) or run directly to the fuse box, similar to a dashcam, for continuous power if they have parking monitoring features.
- Video Signal: The video signal from these cameras needs to be routed to your stereo or infotainment screen. This often involves running cables along the car’s floor channels, under the door sills, and up to the dashboard.
- Infotainment Integration: For factory-like integration, you might need a video interface module that allows an aftermarket camera’s signal to be displayed on the original Mercedes-Benz screen. This can be a complex step requiring specialized knowledge or professional assistance.
- Camera Mounting: Rear cameras are usually mounted near the license plate or in the trunk lid, while side cameras might be fitted into side mirrors or lower body panels. Precision drilling might be required, so careful measurement is key.
Tips for a “Luxury Fit” Finish
A true luxury fit is about meticulous attention to detail. Here’s how to elevate your C Class camera install:
- Hide All Wires: No wires should be visible. Tuck them into headliners, under trim, behind panels, and secure them with zip ties to prevent noise and damage.
- Use Quality Connectors: Avoid loosely twisted wires. Use proper crimp connectors, T-taps, or soldered connections with heat shrink tubing.
- Consider Professional Kits: Some higher-end dashcams offer “hardwire kits” with specific connectors designed to interface with Mercedes-Benz fuse boxes, making the power connection much cleaner.
- Match Interior Colors: If any part of the camera mount or visible wiring needs to be exposed, try to use black or dark gray materials that blend with the C-Class interior.
- Cleanliness is Key: Keep your workspace clean, and meticulously clean any surfaces before applying adhesive mounts.
- Test Thoroughly: Before closing up panels, double-check all connections and functionality.
Common Issues and Troubleshooting
Even with careful installation, you might encounter minor issues.
- No Power: Double-check your fuse tap connection, ground connection, and battery terminal. Ensure the fuse you tapped into is ignition-switched.
- Camera Flickers or Turns Off Randomly: This could indicate a loose connection, an insufficient ground, or a power draw issue. Re-seat all connections.
- “Check Engine” or Warning Lights: If you’ve accidentally interfered with a critical sensor wire or caused a power surge, a warning light might appear. Reconfirm all connections and ensure no factory wires were damaged. Disconnecting the battery for a few minutes can sometimes reset the car’s computer.
- Rattling Noises: This usually means a wire isn’t secured properly. Go back and zip-tie any loose wires away from moving parts or vibrating surfaces under the dash.
Conclusion:
Upgrading your Mercedes-Benz C-Class with a camera system is a rewarding project that enhances both your safety and driving convenience. By following these steps and paying close attention to detail, you can achieve a pristine, factory-integrated look that complements the luxury of your vehicle. Remember, patience and precision are key.
Taking your time to properly route wires, secure connections, and conceal all components will ensure your camera system performs reliably and enhances your C-Class experience for years to come. Enjoy the added peace of mind and sophisticated functionality that your new camera brings to every journey.
Frequently Asked Questions (FAQ)
1: Do I need to disconnect my C-Class battery before installing a camera?
Yes, it is highly recommended. Disconnecting the negative battery terminal prevents accidental short circuits and protects your C-Class’s sophisticated electronic systems.
2: Can I install a dashcam without cutting any factory wires?
Absolutely. Using add-a-circuit fuse taps for power and ensuring all other connections are plug-and-play or reversible is the standard for a clean, non-intrusive installation.
3: How long does a typical dashcam installation take for a C-Class?
For a beginner, a basic front-facing dashcam install can take anywhere from 1 to 3 hours, depending on how efficiently you can route wires and access the fuse box.
4: Will installing a camera void my Mercedes-Benz warranty?
Generally, an aftermarket camera installation that doesn’t require cutting factory wires or modifying the car’s core systems should not void your warranty. However, if an issue directly arises from the installation that affects a factory component, that specific component’s warranty could be affected.
5: What’s the difference between using a cigarette lighter adapter vs. hardwiring a dashcam?
Cigarette lighter adapters are simple plug-and-play but leave a visible wire and can sometimes draw constant power even when the car is off. Hardwiring allows for a hidden wire setup and provides ignition-switched power, which is essential for features like parking mode and a cleaner look.
6: Are there specific dashcams recommended for Mercedes-Benz C-Class?
While many dashcams work, premium brands like BlackVue, Thinkware, and Viofo often offer high-quality components and discreet designs that complement a luxury vehicle’s interior. Some even offer specific Mercedes-Benz wiring adapters for easier installation.