Mercedes-Benz C Class Brake Upgrade: Ultimate Performance, Effortless Braking
Upgrade your C-Class brakes for significantly improved stopping power, reduced fade during spirited driving, and a more confident feel. This guide makes the process understandable, ensuring you can enjoy safer, more responsive braking.
Driving a Mercedes-Benz C-Class offers a refined experience, blending luxury with dynamic capability. However, for those who push their C-Class a bit harder, whether on winding country roads or a track day, the original braking system might feel like a limiting factor.
It’s a common concern among enthusiasts: how can we enhance stopping performance without sacrificing the car’s inherent comfort and sophistication? The good news is that a C Class brake upgrade is well within reach, and it doesn’t have to be overly complicated or intimidating.
We’ll walk you through the reasons why you might consider an upgrade, delve into the different types of components available, and guide you through the considerations for choosing the right kit for your needs. By the end of this article, you’ll have a clear understanding of how to achieve ultimate performance and effortless braking in your beloved C-Class.
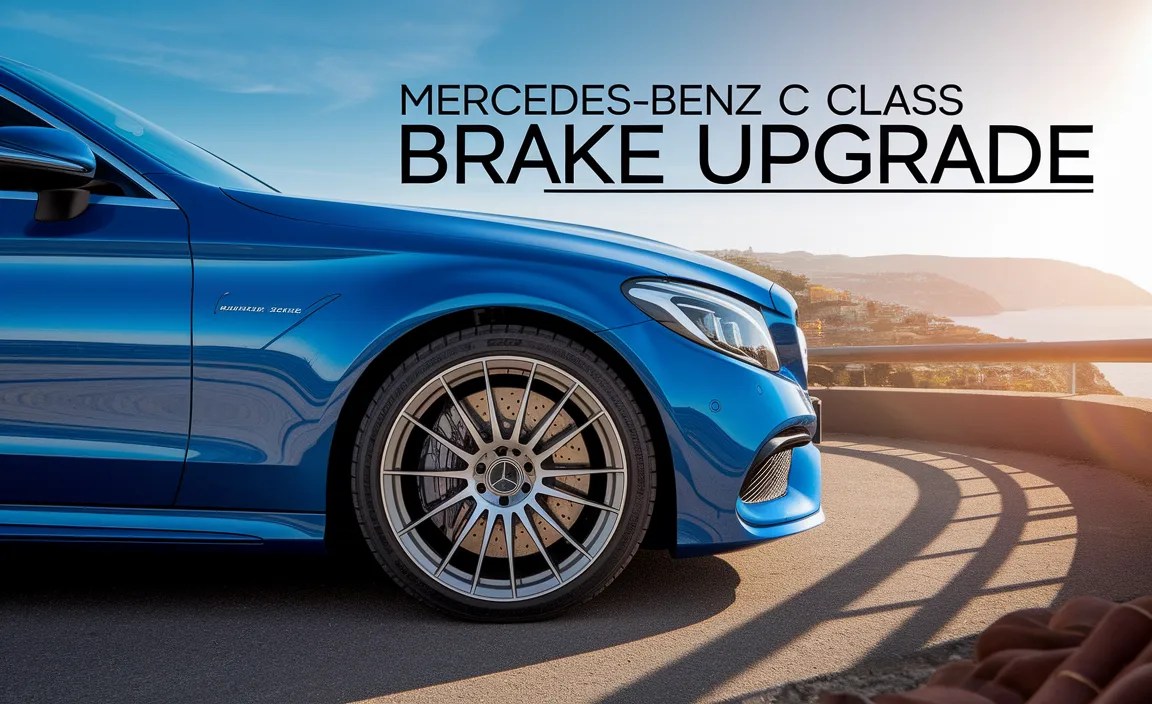
Why Upgrade Your C-Class Brakes?
Your Mercedes-Benz C-Class comes equipped with a braking system designed to meet stringent safety and performance standards for everyday driving. However, several scenarios can highlight the limitations of the stock setup and make a brake upgrade a worthwhile consideration:
One of the most common reasons for considering a brake upgrade is enhanced stopping power. When you’re driving enthusiastically, especially on twisty roads, the ability to brake later and harder inspires confidence. A performance brake system can significantly reduce stopping distances.
Brake fade is another significant concern for spirited drivers. This happens when the brakes lose effectiveness due to excessive heat buildup. Performance brake components are designed to dissipate heat more efficiently, maintaining consistent stopping power even under demanding conditions. This is crucial for safety and enjoyment, particularly during prolonged or aggressive driving.
Beyond pure performance, upgrading your brakes can also improve the overall feel and responsiveness of the pedal. Performance pads and braided lines, for example, can offer a firmer, more direct connection between your foot and the braking mechanism, providing better modulation and feedback.
For some owners, aesthetics play a role. Larger, more aggressive-looking calipers and rotors, often finished in vibrant colours, can significantly enhance the visual appeal of the C-Class, especially when paired with larger aftermarket wheels.
Finally, for those track day enthusiasts or individuals who regularly subject their vehicles to extreme braking, an upgraded system is almost a necessity for both safety and longevity of the components.
Understanding C-Class Brake System Components
A C Class brake upgrade involves optimizing several key components. Understanding what each part does will help you make informed decisions.
Brake Rotors (Discs)
These are the rotating discs that the brake pads clamp down on to create friction and slow the vehicle. Stock rotors are typically solid or have minimal ventilation. Performance rotors often feature:
- Drilled Rotors: Holes help vent gases and some heat away from the pad surface, potentially reducing fade and improving wet weather performance by providing channels for water to escape.
- Slotted Rotors: Slots help to keep the pad surface clean and clear away dust and gases, maintaining consistent contact. They also aid in heat dissipation.
- Two-Piece Rotors: These often feature a lightweight aluminum hat connected to a high-strength iron or carbon-ceramic friction ring. They are lighter, dissipate heat better, and can be more durable under extreme use.
- Larger Diameter Rotors: Increasing the rotor diameter allows for greater surface area contact with the pads and better leverage for braking, leading to increased stopping power.
When considering rotors, it’s important to balance performance with everyday drivability. Drilled rotors can sometimes create more pad noise and wear faster than plain or slotted rotors in daily use.
Brake Pads
Brake pads are the friction material that presses against the rotors. Different compounds offer varying benefits and drawbacks:
- Street/Performance Pads: These offer a good balance between stopping power, everyday noise levels, and dust production. They are an excellent starting point for most C-Class owners seeking an upgrade.
- Track/Race Pads: These compounds are designed for extreme high-temperature performance and offer superior stopping power. However, they often produce significant dust, can be noisy, and may cause accelerated rotor wear in daily driving.
- Ceramic Pads: Known for their low dust output, quiet operation, and good heat resistance, ceramic pads offer a more refined upgrade for street use.
Choosing the right pad compound is critical. A high-performance pad that works well on the track might be uncomfortable or impractical for daily commuting.
Brake Calipers
The caliper houses the brake pistons, which push the brake pads against the rotor. Upgrading the calipers typically involves moving to:
- Multi-Piston Calipers: While most C-Class models come with single or dual-piston calipers, performance upgrades often involve calipers with 4, 6, or even 8 pistons. More pistons mean more even pressure distribution across the brake pad and greater clamping force.
- Larger Diameter Calipers: These can accommodate larger brake pads and rotors, further increasing braking capability.
Replacing calipers is often the most significant part of a C Class brake upgrade and can be a substantial investment. Many kits are designed to be direct replacements for factory components, simplifying installation.
Brake Fluid
Your brake fluid is the hydraulic medium that transmits force from the brake pedal to the calipers. During hard braking, fluid temperature can rise, leading to “brake fade” as air bubbles form. Upgrading to a higher boiling point fluid is essential to combat this.
- DOT 3, DOT 4, and DOT 5.1 Fluids: These are common specifications, with higher numbers generally indicating higher dry and wet boiling points. For performance applications, DOT 4 or DOT 5.1 are strongly recommended over standard DOT 3.
- High-Performance Fluids: Many manufacturers offer specialized racing brake fluids with extremely high boiling points, designed for the most demanding conditions.
Changing your brake fluid is a relatively simple maintenance item that pairs perfectly with any brake upgrade. Consult your owner’s manual for the recommended fluid type for your specific C-Class model.
Stainless Steel Braided Brake Lines
Standard rubber brake lines can expand slightly under pressure, especially when hot. This expansion can lead to a less firm brake pedal feel.
- Stainless Steel Construction: These lines are encased in a braided stainless steel sheath, making them much more resistant to expansion.
- Improved Pedal Feel: The lack of expansion provides a firmer, more consistent brake pedal feel, translating to more precise braking.
This is a relatively inexpensive and easy upgrade that can make a noticeable difference in pedal feel and confidence.
Types of C-Class Brake Upgrade Kits
When you decide to upgrade, you’ll typically encounter a few common approaches, ranging from simple component swaps to full-blown big brake kits.

1. Pad and Rotor Replacement Kit
This is the most common and accessible type of C Class brake upgrade. It involves replacing your factory rotors and pads with higher-performance aftermarket units. This can improve stopping power, heat management, and feel without requiring extensive modifications.
Pros:
- Relatively affordable.
- Easy to install, often a direct bolt-on.
- Significant improvement over worn stock parts.
- Wide variety of pad compounds and rotor styles available.
Cons:
- Limited by the factory caliper size/design.
- May not offer the same level of performance as a big brake kit.
2. Big Brake Kit (BBK)
A Big Brake Kit is a comprehensive upgrade that typically includes larger rotors, multi-piston calipers, performance pads, and sometimes stainless steel braided lines and caliper brackets. These kits are designed to provide the ultimate in stopping power and heat dissipation.
Pros:
- Maximum stopping power and fade resistance.
- Superior heat management for track use.
- Often offers a dramatic improvement in pedal feel and modulation.
- Aesthetically striking.
Cons:
- Significantly more expensive than pad/rotor kits.
- May require suspension modifications or larger wheels to clear the calipers.
- Installation can be more complex, sometimes requiring professional help.
- Can be overkill for street-only driving.
3. Component-Specific Upgrades
This approach involves upgrading individual components rather than a complete kit. For example, you might upgrade just to performance pads and braided lines, or perhaps just to slotted rotors. This offers a more tailored approach based on your specific needs and budget.
Pros:
- Allows customization based on budget and performance goals.
- Can be phased in over time.
- Focuses on the most impactful areas first.
Cons:
- Requires a good understanding of brake dynamics to select compatible parts.
- May not yield as dramatic an improvement as a matched BBK.
Choosing the Right C-Class Brake Upgrade for You
Selecting the appropriate brake upgrade for your C-Class depends heavily on your driving habits, budget, and performance aspirations.

Consider Your Driving Style
Daily Driver: If your C-Class is primarily a comfortable commuter, a significant upgrade might offer diminishing returns and potential downsides like increased noise and dust. However, even for daily drivers, a good quality pad and rotor replacement with stainless steel lines can offer enhanced safety and a slightly more responsive feel. Look for “street performance” pads and rotors.
Spirited Driver: For those who enjoy occasional spirited drives on twisty roads, a performance pad and rotor upgrade, combined with braided lines and performance brake fluid, is often the sweet spot. This setup provides a noticeable improvement in stopping power and fade resistance without sacrificing daily comfort.
Track Day Enthusiast: If you frequently take your C-Class to the track or autocross events, a Big Brake Kit (BBK) is highly recommended. These kits are engineered for extreme temperatures and sustained high-performance braking. Full-synthetic racing brake fluid is also essential here.
Budget Considerations
Brake upgrades can range from a few hundred dollars for a set of performance pads and rotors to several thousand for a complete BBK from a reputable manufacturer like Brembo, AP Racing, or Alcon. It’s wise to establish a budget upfront.
Wheel Clearance
Larger rotors and calipers, especially those found in BBKs, may not fit behind your factory wheels. Before purchasing a BBK, confirm the minimum wheel diameter and offset required for the kit. You might need to purchase new wheels or use wheel spacers. Always verify clearance with the kit manufacturer.
Ease of Installation
Replacing pads and rotors is a relatively straightforward DIY job for someone with basic mechanical skills and tools. Replacing calipers and associated components, especially on the front axle where the master cylinder and ABS system are involved, can be more complex and might be best left to a professional mechanic. Research installation guides or seek professional help if you are unsure.
Step-by-Step: A Typical C-Class Brake Upgrade (Front Rotors & Pads)
Here’s a general overview of how a common C Class brake upgrade – replacing front rotors and pads – would typically be performed. This is intended as an informational guide; consult a professional if you are not comfortable with automotive work.
What You’ll Need (Tools & Materials)
- New performance brake rotors (pair)
- New performance brake pads (set)
- High-temperature brake lubricant/grease
- Brake cleaner spray
- Jack and jack stands
- Lug wrench
- Socket set and ratcheting wrench
- Torque wrench
- C-clamp or brake piston compressor tool
- Wire brush
- Safety glasses and gloves
- (Optional) Brake fluid and bleed kit if replacing lines or fluid
The Process
- Prepare the Vehicle: Park on a level surface. Engage the parking brake (if working on the rear) and block the wheels that will remain on the ground for safety.
- Lift and Secure: Loosen the lug nuts on the wheel you’ll be working on. Using a jack, lift the vehicle at the designated jack point. Securely place jack stands under the vehicle’s frame. Lower the vehicle onto the jack stands.
- Remove the Wheel: Fully unscrew the lug nuts and remove the wheel.
- Inspect the Old Components: Take a moment to observe the current condition of your rotors and pads.
- Remove the Caliper: Locate the caliper mounting bolts (usually on the back of the caliper). Unbolt and remove them. You may need to gently pry the caliper off the rotor. Be careful not to let the caliper hang by the brake hose. Use a sturdy wire or hook to suspend it from the suspension.
- Remove the Brake Pads: The old pads should now be accessible. They may slide out of the caliper bracket or be held in place by clips.
- Remove the Rotor: The rotor is usually held on by a small screw or just the pressure of the wheel. Remove any retaining screws. The rotor should then pull off the hub. If it’s stuck, you may need to tap it gently with a rubber mallet.
- Clean the Hub: Use a wire brush to clean away any rust or debris from the wheel hub where the new rotor will sit. This ensures proper seating.
- Install the New Rotor: Carefully place the new rotor onto the hub. Ensure it’s seated flush. Reinstall any retaining screws if applicable.
- Prepare the New Pads: If your new pads came with anti-squeal shims, install them according to the manufacturer’s instructions. Apply a small amount of high-temperature brake lubricant to the back of the pads and the pad’s contact points within the caliper bracket. Avoid getting lubricant on the friction material.
- Install the New Pads: Insert the new brake pads into the caliper bracket. Ensure they are seated correctly.
- Compress the Piston(s): You’ll need to push the caliper piston(s) back into the caliper body to make room for the new, thicker pads. Use a C-clamp or a dedicated piston compressor tool. If working on the rear, open the brake fluid reservoir cap first and keep an eye on the fluid level. Close the reservoir cap afterwards.
- Reinstall the Caliper: Place the caliper back over the new pads and rotor. Reinstall and tighten the caliper mounting bolts to the manufacturer’s specified torque using a torque wrench.
- Reinstall the Wheel: Mount the wheel back onto the hub. Hand-tighten the lug nuts in a star pattern.
- Lower the Vehicle: Raise the vehicle slightly off the jack stands, remove the stands, and then carefully lower the vehicle completely.
- Torque Lug Nuts: Tighten the lug nuts to the manufacturer’s specified torque using a torque wrench in a star pattern.
- Repeat for Other Side: Perform the same steps on the other side of the axle.
- Bed-In New Brakes: Follow the brake manufacturer’s specific bed-in procedure. This typically involves a series of moderate to firm stops from medium speeds, followed by a period of cooling. This process ensures the pads and rotors mate properly, optimizing performance and longevity. A common method is to perform 8-10 stops from 40-50 mph down to 10-15 mph, without coming to a complete stop, and then drive for several minutes without using the brakes to allow them to cool. Refer to the pad manufacturer’s instructions.
A crucial step for many C-Class models, especially those with more advanced braking systems, is to perform a brake bleed after replacing components, particularly if brake lines were changed or a significant amount of fluid was lost. This ensures that no air is trapped in the hydraulic system, maintaining proper pedal feel and brake function. Websites like the Cars.com offer detailed guides on brake bleeding procedures.
Performance vs. Cost: Comparing Upgrade Options
Deciding on a C Class brake upgrade involves balancing performance gains with the investment required. Here’s a simplified comparison:

| Upgrade Type | Estimated Cost (USD, Front Set) | Performance Gain | Installation Difficulty | Best For |
|---|---|---|---|---|
| Performance Pads & Rotors | $300 – $800 | Moderate | Easy | Daily drivers, occasional spirited driving |
| Braided Lines & Fluid | $100 – $300 | Minor to Moderate (pedal feel) | Moderate | Improving pedal feel, complementing other upgrades |
| Entry-Level BBK (e.g., 4-piston) | $1,500 – $3,000+ | Significant | Moderate to Difficult | Enthusiastic drivers, mild track use |


