B Class Engine Mount: Ultimate Power
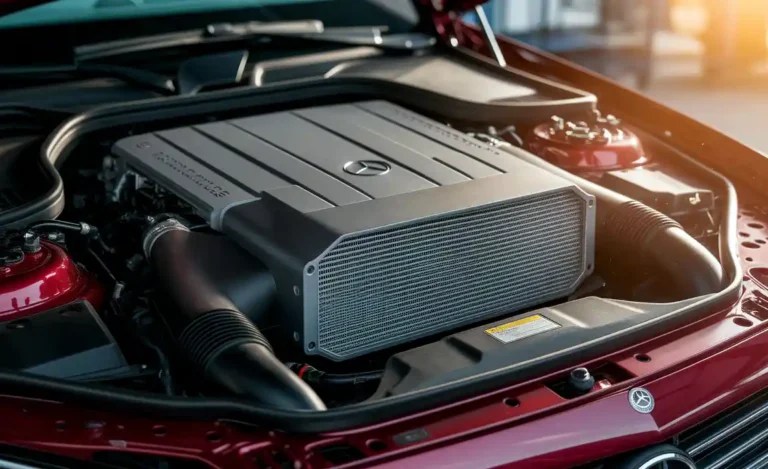
The B Class engine mount is crucial for directing “ultimate power” directly to your wheels. This component isolates engine vibrations and ensures optimal power transfer by securely holding your engine in place. Understanding its role and condition is vital for maintaining your Mercedes-Benz B-Class’s performance, comfort, and longevity. A failing mount can lead to noticeable vibrations, noise, and reduced driving dynamics.
Hello fellow Mercedes-Benz enthusiasts! I’m Bryan Bowman, and here at MercedesBlue, my mission is to demystify the world of our beloved vehicles. Today, we’re diving deep into something that might sound technical but is fundamental to your B-Class’s drive: the engine mount. You might have felt an unusual shudder, heard a new clunk, or noticed your engine seems a bit… unsettled. Often, the culprit is a worn-out engine mount.
These are the unsung heroes that keep your engine precisely where it needs to be, ensuring that the incredible power Mercedes engineers packed into your B-Class finds its way smoothly to the road. Don’t worry if this sounds daunting; we’ll break down exactly what an engine mount is, why it matters, and how you can keep yours in top condition.
What is a Mercedes-Benz B Class Engine Mount?

At its core, a Mercedes-Benz B Class engine mount is a specially engineered piece of hardware designed to secure the engine and transmission assembly to the vehicle’s chassis. However, it does much more than just hold things in place. Its primary functions are to:
- Isolate Vibrations: Engines, by their nature, produce vibrations as tiny explosions happen thousands of times every minute. The engine mount acts as a buffer, absorbing most of these vibrations and preventing them from transferring into the car’s cabin. This is key to the smooth, refined ride Mercedes-Benz is famous for.
- Support Engine Weight: It bears the significant weight of the engine and transmission, ensuring they are held securely in their designated position.
- Allow for Movement: While holding the engine steady, it also needs to accommodate the natural torque and movement the engine experiences during acceleration, deceleration, and gear changes.
- Dampen Noise: By absorbing vibrations, it also significantly reduces the amount of engine noise you hear inside the car.
Modern B Class models, especially those with automatic transmissions, often utilize hydraulic or vacuum-assisted engine mounts. These advanced mounts can actively adjust their stiffness based on vehicle speed and engine load, providing an even more sophisticated level of vibration and noise control. This technology is a significant contributor to the refined driving experience expected from a Mercedes-Benz.
Why Engine Mounts Matter for “Ultimate Power”
When we talk about “ultimate power,” we’re not just referring to horsepower figures; we’re also talking about how that power is delivered to the wheels. A healthy engine mount is crucial for efficient power transfer because:
- Precise Engine Alignment: A good mount keeps the engine and drivetrain aligned correctly. This ensures that power is transmitted in a straight line from the engine’s crankshaft through the transmission and driveshafts to the wheels. Misalignment due to a failing mount can lead to energy loss.
- Reduced Drivetrain Slop: Worn mounts can allow the engine and transmission to move excessively. This creates a feeling of “slop” or looseness in the drivetrain, where pedal input doesn’t immediately translate to wheel response. This sensation detracts from the feeling of direct power delivery.
- Smooth Acceleration: During acceleration, the engine naturally twists. A robust mount manages this torque effectively. If it’s compromised, the engine’s movement can cause jerky shifts or an uneven power delivery, making the acceleration feel less potent and refined.
- Tire Grip: While less direct, excessive engine movement from bad mounts can sometimes unsettle the car during hard acceleration, potentially impacting tire grip and overall stability. This is particularly relevant for spirited driving.
Think of it this way: if your engine mount is like a loose bungee cord, even if the engine is making power, some of that energy is wasted as uncontrolled movement. A firm, well-maintained mount ensures that the power you have is precisely where it needs to be—driving the wheels.
Understanding the Types of B Class Engine Mounts

Mercedes-Benz employs different types of engine mounts across its B Class range, and even within different model years. Understanding these can help you appreciate the engineering and what might be under your hood.
1. Conventional Rubber Mounts
These are the most basic type. They consist of a block of dense rubber sandwiched between metal brackets. The rubber is designed to flex and absorb vibrations. While effective and cost-efficient, their damping properties can degrade over time due to heat, age, and constant stress.
2. Hydraulic (or Fluid-Filled) Mounts
These mounts are more sophisticated. Instead of just rubber, they contain a chamber filled with hydraulic fluid. This fluid helps to dampen vibrations more effectively across a wider range of frequencies. They also often incorporate a diaphragm or piston mechanism to control the fluid’s movement, allowing for variable damping characteristics.
3. Active (or Electronically Controlled) Mounts
These are the most advanced, often found in higher-spec B Class models or those with certain comfort-oriented features. Active mounts use electronic sensors and actuators to adjust their stiffness in real-time. They can stiffen up under acceleration to improve power delivery and soften during cruising to maximize comfort. They often work in conjunction with the vehicle’s stability control or adaptive damping systems.
The specific type of mount in your B Class will depend on its model year, engine variant, and optional equipment packages. For example, a performance-oriented trim might have stiffer mounts than a comfort-focused one, and newer models will almost certainly feature more advanced technologies.
Signs of a Failing B Class Engine Mount
As engine mounts age, the rubber can harden, crack, or tear, and the fluid in hydraulic mounts can leak. When this happens, the mount loses its ability to dampen vibrations and support the engine correctly. Here are the most common signs that your B Class engine mount might need attention:
- Increased Vibration: The most common symptom is feeling more engine vibrations through the steering wheel, pedals, or the seat. This is especially noticeable when the engine is idling or under load (e.g., during acceleration or climbing a hill). You might feel a constant tremor that wasn’t there before.
- Knocking or Clunking Noises: When accelerating, decelerating, or shifting gears, you might hear a distinct “clunk” or “thud” from the engine bay. This happens because the engine is moving more than it should, hitting against its mounts or other components.
- Engine Sagging or Unevenness: Visually, or by feel, the engine might appear to sit lower or at an angle that seems off. This is a sign that the mount has collapsed under the engine’s weight.
- Harsh Shifting: Particularly with automatic transmissions, worn mounts can lead to rougher or more noticeable gear changes. The drivetrain is no longer held steady, so the engagement feels less smooth.
- Excessive Engine Movement: During hard acceleration, you might feel the engine “lurch” or twist more than usual. This indicates the mount is not effectively counteracting engine torque.
- Warning Lights (Less Common but Possible): In some modern vehicles, if an active mount fails in a way that affects sensor readings, it might trigger a check engine light or a specific drivetrain warning. However, for most conventional mount failures, there won’t be an illuminated warning light.
It’s important to note that some of these symptoms can overlap with other issues, such as transmission problems or exhaust leaks. However, a persistent increase in vibration, especially accompanied by clunking noises during shifts, strongly points towards a faulty engine mount.
DIY: Replacing a B Class Engine Mount (General Guide)
Replacing an engine mount is a task that can be tackled by a mechanically inclined DIYer, but it requires care, the right tools, and often a helping hand. The complexity can vary significantly depending on the mount’s location and the specific B Class model. This is a general guide, and you should always consult a service manual specific to your year and model for precise instructions.
Tools and Materials You’ll Need:
- New B Class engine mount (ensure it’s the correct part for your vehicle)
- Socket set and wrenches (metric)
- Torque wrench
- Jack and jack stands
- Engine support bar or a sturdy block of wood and a floor jack (to support the engine)
- Pry bar (use with caution)
- Penetrating oil (for stubborn bolts)
- Gloves and safety glasses
Step-by-Step Replacement Process:
- Safety First: Park the vehicle on a level surface. Engage the parking brake firmly. Loosen the lug nuts on the front wheels but don’t remove them yet.
- Lift and Secure: Use a floor jack to lift the front of the car and securely place jack stands under the designated support points. Lower the car gently onto the jack stands. Remove the floor jack for now.
- Access the Mount: Depending on which mount is being replaced, you may need to remove other components, such as undertrays, air intake parts, or even battery components. Locate the specific engine mount you are replacing.
- Support the Engine: This is a critical step. Before you unbolt the mount, you MUST support the engine’s weight. This can be done using an engine support bar (which spans across the engine bay from strut tower to strut tower) or by carefully placing a floor jack with a block of wood under the oil pan (be extremely cautious not to damage the pan or internal components). The goal is to take the engine’s weight off the mount.
- Unbolt the Old Mount: With the engine securely supported, you can now unbolt the failing engine mount. There will likely be several bolts attaching the mount to the chassis and/or the engine cradle, and possibly a large nut or bolt holding the mount itself to the engine bracket. Use the appropriate sockets and wrenches. If bolts are seized, apply penetrating oil and let it soak.
- Remove the Old Mount: Once all bolts are removed, the old mount should be free. You might need to gently wiggle it or use a pry bar carefully if it’s stuck.
- Install the New Mount: Position the new engine mount into place. If it’s an active mount, ensure any electrical connectors are accessible and ready to be plugged in.
- Bolt in the New Mount: Reinstall and hand-tighten all the bolts and nuts for the new mount.
- Torque Bolts to Specification: This is where a torque wrench is essential. Consult your service manual for the correct torque specifications for each bolt. Overtightening can strip threads, while undertightening can lead to premature failure.
- Remove Engine Support: Once all bolts are torqued, you can carefully remove the engine support bar or jack.
- Reassemble: Reinstall any components you removed to gain access.
- Lower Vehicle and Tighten Lug Nuts: Lower the vehicle back to the ground. Tighten the wheel lug nuts to the manufacturer’s specified torque.
- Test Drive: Take the car for a gentle test drive to ensure everything feels right. Listen for any unusual noises and pay attention to vibrations.
Important Considerations for DIY:
- Location: Engine mounts can be on the sides, front, or rear of the engine. Which one is failing dictates the difficulty.
- Hydraulic/Active Mounts: These often have vacuum lines or electrical connectors that need to be disconnected and reconnected properly.
- Service Manual: Always refer to the official Mercedes-Benz service manual for your specific model year. It will provide exact procedures, torque specs, and component locations. You can often find these online or purchase them from automotive repair resources. Resources like ALLDATA DIY offer professional repair information for DIYers.
- Professional Help: If you’re unsure about any step, especially supporting the engine, it’s always best to consult a qualified mechanic.
When to Call a Professional
While some DIY enthusiasts enjoy tackling engine mount replacements, there are definite situations where calling a professional Mercedes-Benz technician is the wiser choice. These include:
- Lack of Confidence or Tools: If you don’t have the necessary specialized tools (like an engine support bar or a precise torque wrench) or feel uncomfortable with any stage of the process, it’s best left to the experts.
- Complex Mount Locations: On many modern vehicles, including some B Class variants, engine mounts can be tucked away in difficult-to-reach areas, requiring extensive disassembly of other components. This significantly increases the complexity and time commitment.
- Hydraulic or Active Mounts: While not impossible for DIY, troubleshooting and correctly installing hydraulic or electronically controlled mounts require a deeper understanding of their systems. Incorrect installation can lead to performance issues or damage.
- Multiple Mounts Failed: Often, if one engine mount fails, others may be close behind. A technician can assess the condition of all mounts and recommend a comprehensive replacement.
- Confirmation of Diagnosis: If you’re experiencing symptoms but aren’t 100% sure they are from the engine mount, a mechanic can perform a thorough inspection to confirm the diagnosis and rule out other potential issues.
A reputable Mercedes-Benz specialist or dealership will have the experience, diagnostic equipment, and genuine Mercedes-Benz parts to ensure the job is done correctly, which is essential for maintaining the integrity of your vehicle’s powertrain and overall driving refinement.
Comparing Common B Class Engine Mounts and Their Lifespan
The lifespan of a B Class engine mount can vary based on the type of mount, driving habits, and environmental conditions. Here’s a general comparison:
| Mount Type | Typical Lifespan (Miles) | Key Characteristics | Pros | Cons |
|---|---|---|---|---|
| Conventional Rubber | 60,000 – 100,000 | Simple construction, relies on rubber’s elasticity. | Cost-effective, simple design. | Can degrade faster with heat and age, less effective damping than others. |
| Hydraulic/Fluid-Filled | 80,000 – 120,000+ | Uses fluid to improve damping, often has more complex internal structure. | Better vibration and noise isolation, handles engine torque well. | More complex, potential for fluid leaks, higher replacement cost. |
| Active/Electronic | 100,000 – 150,000+ | Electronically controlled stiffness, integrates with vehicle systems. | Optimal comfort and performance, highly adaptable. | Most complex, highest replacement cost, relies on electronic systems for function. |
These figures are estimates. Aggressive driving, frequent short trips (which don’t allow the engine to reach optimal temperature and can stress components), and exposure to road salt or harsh chemicals can all shorten the lifespan of engine mounts. Conversely, gentle driving and good maintenance can extend it.
Beyond the Mount: Other Factors Affecting Power Delivery
While a healthy engine mount is vital for the feel of “ultimate power,” other components also play a critical role in how efficiently and smoothly your B Class delivers its performance. If you’ve replaced your mounts and still feel something isn’t quite right, consider these:
- Transmission Mounts: Similar to engine mounts, transmission mounts secure the gearbox to the chassis and absorb vibrations. They are just as susceptible to wear and failure. Diagnosing and replacing these often involves similar procedures.
- Driveshafts and CV Joints: These components transfer rotational power from the transmission to the wheels. Worn constant velocity (CV) joints can cause clicking noises during turns, while unbalanced driveshafts can lead to vibrations that might be mistaken for mount issues.
- Motor/Generator Mounts (for Hybrid/EV models): If you have a B-Class variant with hybrid or electric powertrains, these specialized mounts are critical for supporting the electric motor(s) and battery systems, and ensuring their unique vibrations are isolated.
- Exhaust System: A loose or damaged exhaust system, including flexible pipes (flex pipes) or hangers, can transmit engine vibrations into the chassis, mimicking symptoms of failing engine mounts.
- Wheel Bearings and Suspension Components: While typically causing different types of noises or handling issues, significantly worn wheel bearings or suspension bushings can sometimes contribute to a general feeling of looseness or vibration that might get confused with powertrain-related problems.
- Tire Condition: Uneven tire wear, imbalances, or damaged tires can cause significant vibrations that are felt throughout the vehicle.